Trestle Table

I’ve been waiting to make a dining table until after we put new flooring in so that there’s less stuff to move around when the time comes. But Thanksgiving was a month away and our guests needed something to gather around. I looked at some used tables as a temporary solution, but decided that a month was enough time to do this project. And even though the maple lumber itself is more expensive than a used table, I’d be making one eventually so I’d be saving money in the long run.

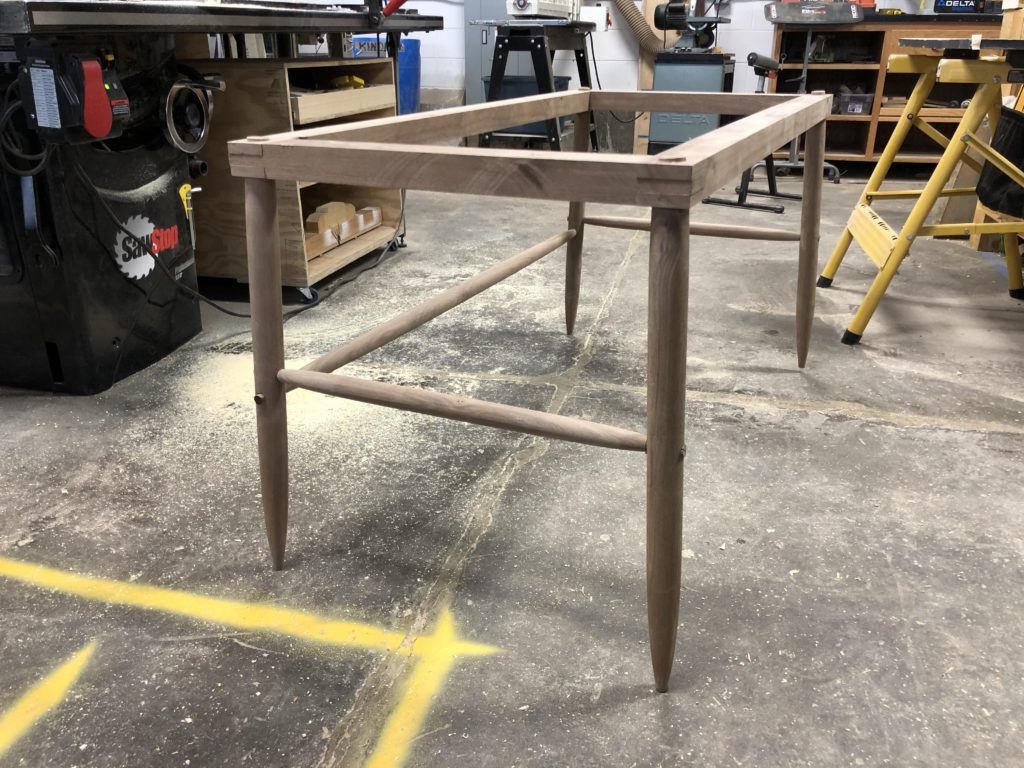
For some time, I had planned on making a copy of Ikea’s Mockelby table, and after taking another look, concluded that four weeks might not be enough time. The table has splayed legs and other angled joints. In fact, the legs are splayed in both directions, meaning that the ends of the legs would be a compound angle. My bedside table project taught me that angled joinery takes time to get right if you want no gaps. I didn’t want to risk it, so I looked for a different design.

Mockelby table

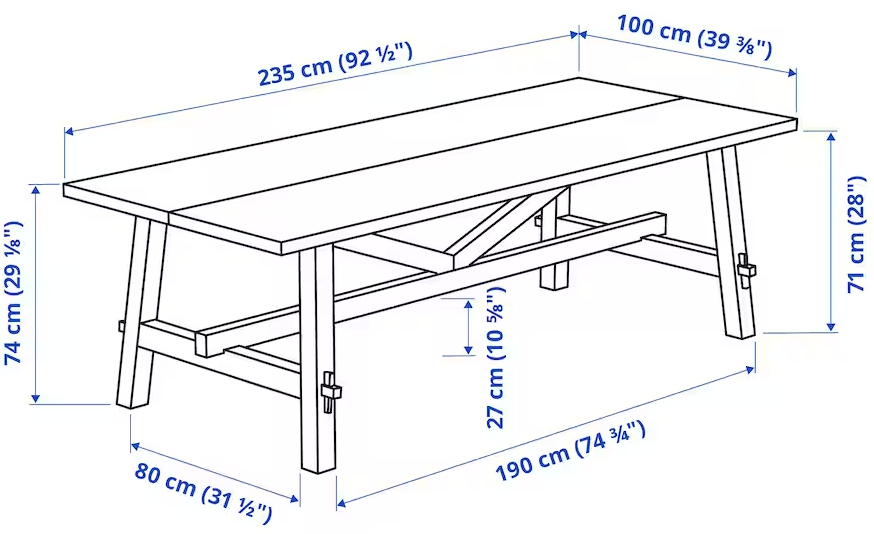
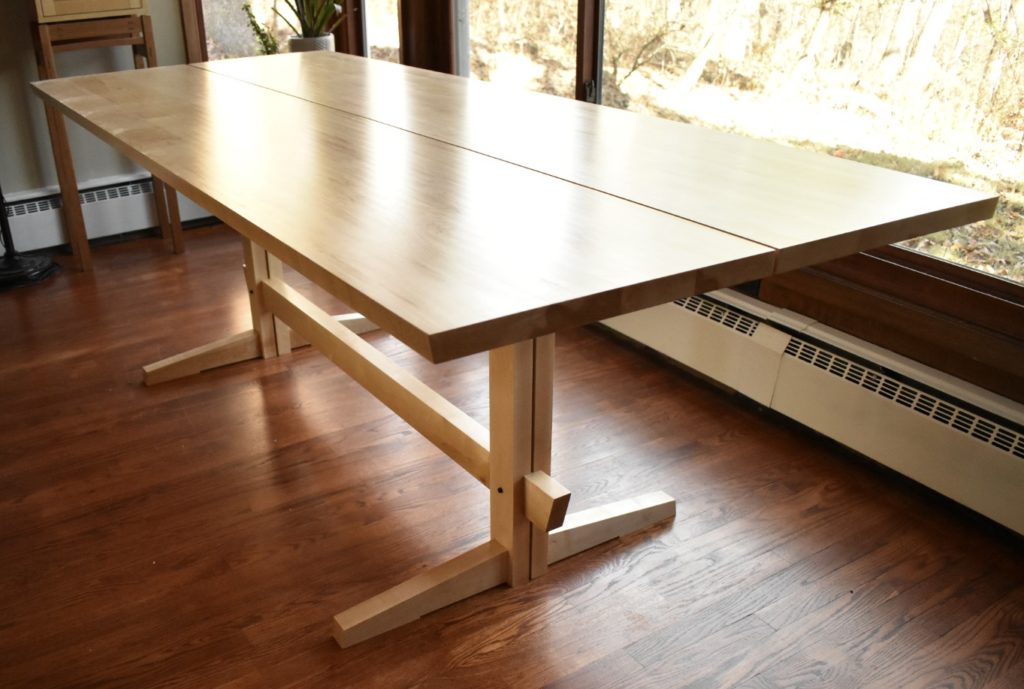
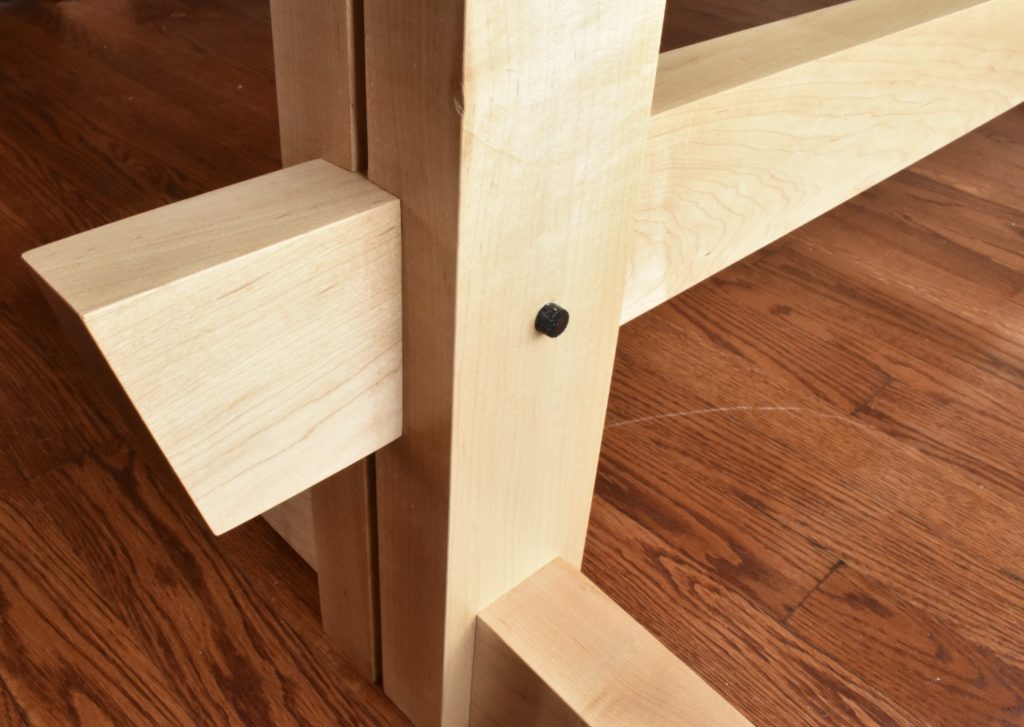
I found Marcus Soto’s trestle table and appreciated the simple, modern lines, which is partly due to the 90 degree joinery. I made a few modifications to it. First, I shortened the table by 8 inches so that it would fit in our dining room. Second, I kept the split table top design of the Mockelby. A practical benefit of a split top is that you save time by not having to join the two slabs together and flatten any misalignments. Last, I added an angle to the ends of the feet that I enjoy in George Nakashima’s work.

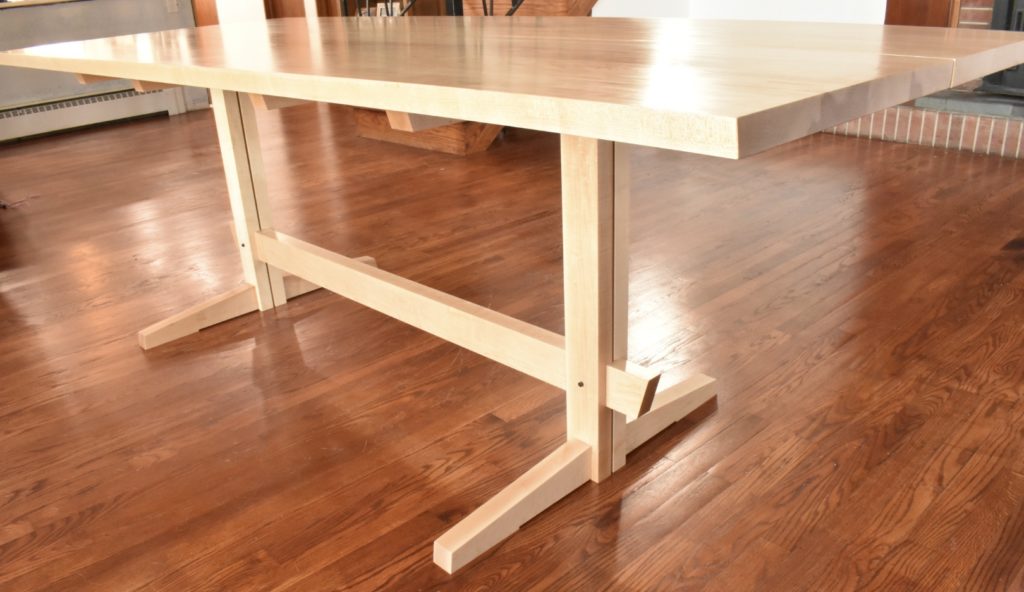
I made a couple quick temporary benches from some retired bed slats and finished everything just in time for the big day. I look forward to seeing the table gradually acquire an amber tone and maybe even some dents and scratches from the frequent use it is sure to get.

Temporary Shop

I’m excited to get the shop going at the new house, but the reality is starting to settle in: This is going to take a while. This 52 year old home needs maintenance and repair. Trees need to be cut down, a new roof needs to be applied, and the mice need to be evicted. And then there’s the remodeling of the 80’s-era interior.

The original plan was to have the shop in the garage. I could use that temporarily until the new shop is built. It takes months to find a contractor, get a plan designed, and construct. I got an estimate from an electrician to add 220V service to the garage to power a jointer, planer, and dust collector. But then I changed my mind. Why not just wait and put all my resources into the new shop? By delaying gratification, I’ll save money by not doing the electric twice. But I’ll also save money on the other plans I had for the garage: hanging drywall, insulating the ceiling, and sealing the garage floor

Until the new shop happens, there are things I can do now in the garage that can transfer over. I picked up a miter saw, drill press, and dust collector on sale. I put together a miter saw station based on the Wood Whisperer’s design. Everything you’ve heard about LED lighting is true. You can have prodigious amounts light with minimal outlay. What’s missing from this picture is the table saw. That’s up next, but first I need to answer some questions. It’s going to take up a parking spot and winter is coming. Am I prepared to park outside this winter? I don’t have 220v electricity for dust collection. Can I live with Shop-Vac dust collection for a while? We woodworkers are a patient folk. I think the answer is yes.

Moving Day

Today I moved my woodworking studio out of The Bodgery and in the the garage of my new house. For more than a year, I’ve been searching for a house where I can fulfill the dream of having my own wood shop. My plan is to build a dedicated shop when I outgrow the garage.

I moved three cabinets and a workbench by myself with the help of a cart. Using the carts, the floor, and the hatch of my vehicle, I never had to lift the full weight of anything. Except for lifting the upper cabinets off of the french cleats onto the bench below.

4×8 studio at The Bodgery

I designed my workspace to mobile. The workbench is a design employing interlocking Chinese joinery. No glue or fasteners are used – everything slides together and the mortised bench top locks everything together. The bench top is 55 lbs without the vise, which made it a little challenging. The cabinets are held together with screws. Now that they have a more permanent home, I plan to take them apart, apply glue, and screw them back together. I didn’t need to take them apart to move them – they fit in my hatch back, barely.

The Bodgery quickly ran out of wood shop area after it moved to its new space, and will be taking back the precious space that was my studio.

The Bodgery needs more space due to surging membership

I moved everything into the garage and did a little organizing, but it will be a few days before all the tools find their way back home. As I was organizing, there was a definitive moment when it felt like a workshop. It’s when I took the clamps off of the shelf and hung them up. And hanging up my apron emphasized it.

The beginning

Now comes the purchasing of many, many tools large and small. More to come.

Where there’s a will, there’s a lathe

We like woodworking because it’s challenging. Sometimes an unexpected challenge rears its head mid-project, and creative problem solving is required. The tinkerer in us rejoices.

I’m working on Michael Robbins’s contemporary desk from Fine Woodworking Sep/Oct 2018 (we’ll, I’m making the base anyway). If you want to make those legs, you’re going to need a lathe. My makerspace has lathes. In my head, I check this item off as I’m preparing for the project.

Turning the legs and the side stretchers is good turning experience for me and goes relatively smoothly. The last piece to turn was the long stretcher that spans the rear legs. The stretcher is 50 inches long. To accommodate my stock, I extend the tailstock all the way to the end of the Jet lathe’s bed. To my surprise, the bed isn’t long enough. The lathe is one of the larger ones I’ve encountered, so apparently 50 inches is pretty long as far as spindles go. Time to think about options. I consider having a local shop make this part for me, but I’d have to go about finding one and potentially waiting for it to be finished. Curious, I look online for large lathes. How much would one cost? Another surprise: I never find the answer because the longest bed I could find for sale is 48 inches.

I consider making the stretcher in two pieces and joining them together with a dowel, but that isn’t aesthetically satisfactory. I talk to some people at The Bodgery. Jim, the wood shop captain, and a cabinet maker for decades, quickly rattles off four or five ideas. One of them being, “You could put two lathes together, end-to-end”. This idea immediately goes to the top of my list. The Bodgery has a Delta lathe about the same size as the Jet. Could that work? Online, I discover the bed extension, something you can make from wood and attach to the lathe when needed. But the double lathe idea would be easier and faster (if it works).

The first thing I do is take the tailstock from the Jet lathe over to the Delta to see if it fits on the bed. I’m in luck – it clamps down snugly. Then I measure the distance from each bed to the floor. The Delta is a quarter to half an inch higher – pretty close. I bring the Delta over to the Jet and put some scrap wood underneath the Jet to make it the same height. Next, I eyeball the lathes to make sure they’re aligned in a reasonably straight line. Finally, I clamp the lathes together and ready my stock for turning. I spin the stock at low speed to see what happens. I’m delighted to see that it’s turning just like it would normally.

I’d say it took me at least a couple hours to turn the stretcher. But the double lathe worked like a charm. And the dry fit was a success.